
Lip Filler Complication Case Study: Managing a Vascular Occlusion
Filler complications can happen to any aesthetic practitioner, no matter how experienced they might be.
Learning how to deal with complications effectively and calmly in the moment is mostly done through theory. As such, it’s so important that clinicians not feel embarrassed about sharing their personal experiences of managing filler complications. Every story is a chance for others to learn from those insights.
Harley Academy board member and STORY Clinics’ co-founder, Dr Marcus Mehta is an aesthetic medicine expert with over 10 years in clinical practice. He’s injected over 10,000 syringes of filler in that time, yet in 2024 he experienced his worst complication ever.
To help other aesthetics practitioners learn from his experience, he spoke to us about what he calls, “the day it all went wrong”. Read how her symptoms unfolded in this complex case, and the steps Dr Marcus took to resolve them in this 15-stage case.
We are respecting the patient’s privacy by not sharing any of the photos or videos that were taken to document her case.
Stage 1: Lip filler treatment background
“It was a very normal day in clinic and I was treating a regular patient - a woman in her 40s. I’ve been treating her for five years, so was familiar with her goals and preferences as well as her specific anatomy,” says Dr Marcus, setting the scene.
“Her last lip filler appointment with me was three or four months prior, but I hadn't used very much product and she likes a reasonably full lip. So, upon review, I agreed to do this treatment to add a little more as I know this patient well.
“She has great lips and has had treatment for many years. They’re soft and well-sculpted with great natural definition and she doesn't want them to be overfilled. I was basically just adding a small amount of filler into the lips to hydrate them and give her a little more of the plumpness she likes.”
***
Stage 2: Administering the first lip injections
Dr Marcus explained, “For this patient, I treat her lips with a cannula. My approach to this is to treat using quadrants, treating upper right > lower right > upper left > lower left. Those are the four quadrants I'll treat, and I'll usually use about 0.1 to 0.15ml for each of them.
“Once I’ve done that, I have the patient to look in a mirror and ask them where we are size-wise. If they're really happy with how they look at that point, sometimes I’ll add a little more. This is to account for swelling and so the result will be what they’re looking for once this subsides.
“In this particular case, I treated the patient's upper left quadrant, and it was absolutely fine. We were just chatting, and it was a very normal day. I’d administered the lip filler in a superficial placement using a 25g cannula and 0.1ml of soft hyaluronic acid gel. So far, so good.”
***
Stage 3: The first warning signs of a lip filler complication
The treatment was one that Dr Marcus does regularly for his patients. He estimates having carried out around 10,000 filler appointments to date with no complications outside of bruising. So far, there was nothing to signal that this was any different…
“I moved on to treating the upper right quadrant and when I was in there, towards the centre of that lip, the patient noted a bit of discomfort. She said it was very mild, but usually I don't hear any feedback from this particular patient, so this was the first sign that there may be something out of the ordinary. Generally, her treatments are absolutely fine, and she doesn't experience any discomfort,” he said.
“She told me that she had some slight discomfort and said “it feels weird”. Initially, although I thought it was probably nothing, I withdrew my cannula and examined her. That was when I started to see some colour changes in her lip; she said, ‘my lips feel a bit tingly and a bit weird’.
“Obviously no injector expects to encounter vascular events but you do have to always be prepared for them. With this in mind, I quickly reviewed each aspect of the treatment but I couldn’t think of a safer technique or anything I could have done in a better way. Everything had been ‘by the book’, using the evidence-based techniques I always abide by. There was nothing risky or ‘rogue’ about my approach - it was very straight down the line.”

Stage 4: Spasm or vascular occlusion?
At this point the signs of a complication worsened. Understandably, panic started setting in for Dr Marcus - though he was careful to remain calm and methodical for his patient.
He started monitoring the area, palpating the lips and taking photos to document each new change. Videos of capillary refill tests were also taken so this evidence could be used to assess the complication’s progression. As before, we are not sharing these as part of this case study in order to respect the patient’s privacy.
Dr Marcus recalled, “She noticed a bit of discoloration in her upper lip and I could see there was certainly a change happening. This discolouration worsened until it was no longer confined to the portion of her lip where I’d been injecting. The whole area started to become discoloured, right up into the nasolabial fold.
“This was now looking really weird to me,” he shared. “I know that if there’s a vascular occlusion, usually you’d expect to see these changes in the treatment area. However, this was affecting her whole upper lip; the entire superior labial artery had been occluded or had gone into spasm.”
Drawing on his aesthetics training and knowledge of managing filler complications, Dr Marcus ran through potential scenarios.
“I was watching the changes happen as her whole lip went white. All red colour in her lip was lost - pretty much the whole lip blanched and, almost as I was massaging it, momentarily it just flashed white. That was quite shocking so I knew straight away that there was something more serious going on.”
***
Stage 5: Deciding to dissolve the filler
“To give you an idea of how quickly this escalated, at this point, it had been around 10 minutes since I administered the initial lip filler. I was doing regular capillary refill tests which showed a sluggish response. These indicated that there was something not right in the upper right lip, where I was injecting. Because of this, I was sure the problem was in this upper right area.
“However, the weirdest bit of all of this was that it was also in the upper left quadrant. There was a really delayed capillary refill on that side, even more so than on the side I’d been injecting.”
Dr Marcus stated, “I continued to try to work out how this had been caused. You could see the philtral columns hadn’t been affected at this point as the tip of the nose had a normal capillary refill.
“Next, as I was doing more capillary refill tests, the patient had pain in her upper left lip. That was the main site of pain, not the upper right where I’d been injecting. So, although I was still torn as to the precise diagnosis, I knew the filler needed to be dissolved.”
***
Stage 6: Dissolving lip filler
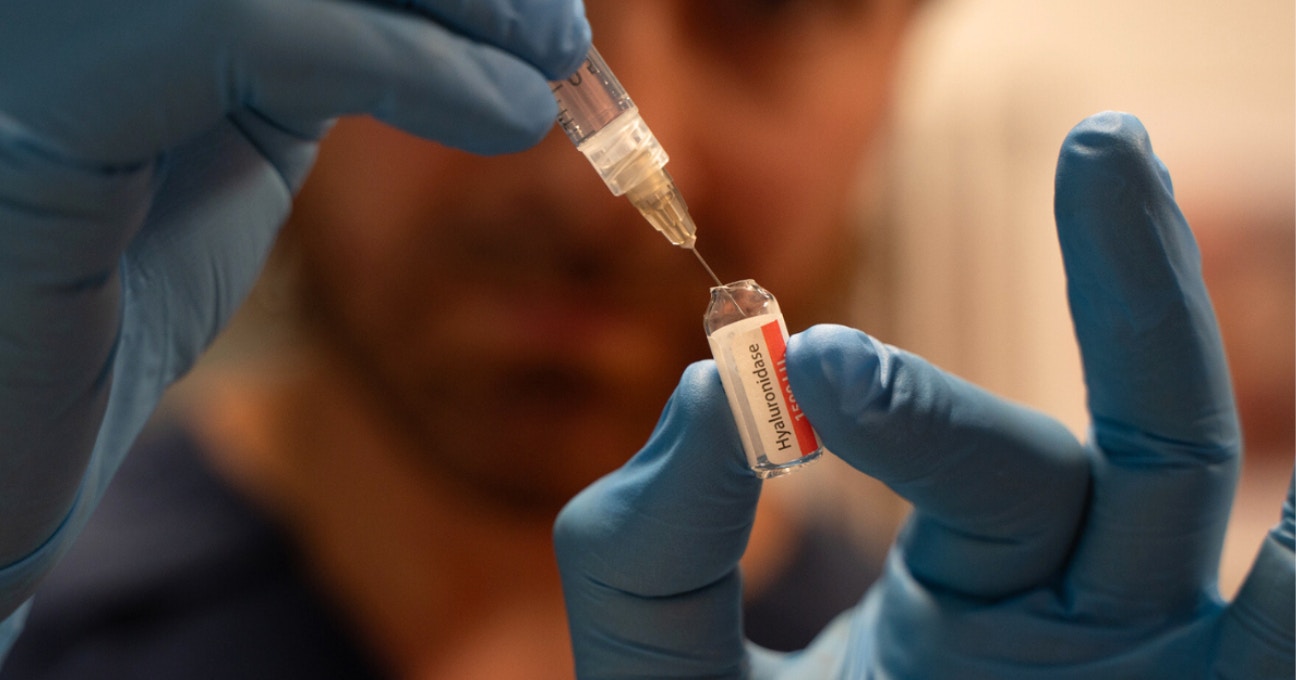
As a cosmetic doctor, Dr Marcus can prescribe and hold stock of hyaluronidase – the enzyme used to dissolve hyaluronic acid-based fillers.
Whilst still torn between whether he was dealing with a vascular event or a spasm, he knew dissolving the filler would help in either case.
“I mixed up two vials of hyaluronidase, each one in 1ml of saline,” he told us. “For the first whole vial of 1500 units, I injected this with a cannula and did the whole lip. First, I went in one side and then the other, exactly how I administered the filler.
“I thought that would dissolve the filler in the lip and help if it was a spasm because there’s a theory that, if you have hyaluronic acid around the vessel, it can trigger a spasmodic episode. My thinking was, if I get rid of all the filler, surely the spasm would go too.
“After that, using the next vial, I went in with a serial punch technique, up the columellar arteries and flooded the whole area. Once I'd done that, I didn’t want to send her home as she lives about two hours away. As she said she felt fine, she went out for lunch, locally, and generally wasn’t too bothered by the lip issues. It was a great sign, however, when she came back from lunch she said, ‘I think I've got hay fever.’
“Except she had never had hay fever before...”
***
Stage 7: More red flags as Day 1 ends
Just because you’ve administered hyaluronidase doesn’t mean the job’s done. When managing a complication, it’s important to stay alert and really listen to your patient.
Dr Marcus detailed how his patient’s passing comment about feeling as if she had hay fever sparked a new concern.
“‘I think I’ve got hay fever because I've got this pain in the top of my nose and I feel just blocked up and my sinuses feel blocked’, she told me. My patient is very honest and was very transparent in letting me know her symptoms. Without her realising, she was almost spelling out red flags to me.
“Her sinus pain sensation was quite worrying to me at this point. The superior labial artery, which is in the zone I was injecting, does have circulation that goes up into that space. It also has links to the great palatine artery among others. At this point, I’d injected 0.4mls of filler n total.”
The patient was experiencing localised pain behind her nose and in the bridge of her nose.
“Before I looked at the anatomy of the area, I said to her that it could be the ‘allergic’ sensation of hyaluronidase. Some people do report ‘allergic’ responses to the drug and the area can flare up. That was my initial feeling, so I advised her to take some antihistamines to see if that helped. I’d already injected two vials of hyaluronidase so wanted to see the effect this had.
“I assessed her oral cavity and tongue, as well as the surrounding areas, and everything looked profuse. At this point, she was able to go home but I made sure she had my emergency contact details for reassurance.”
***
Stage 8: Day 2 brings “excruciating” pain on left-hand side
“When I saw her on Day 2, her lips looked better perfused and, initially, I felt happier with the situation. However, her left nasolabial fold and the left side of her lip was excruciatingly painful. I couldn’t even touch it very well without local anaesthetic as it was so tender.
“She still had the sinus pain high in the bridge of her nose and now also had what she described as tooth or gum pain. This was also in the left side of her mouth.
“Straight away, this felt like a more complex situation and it definitely worried me. It wasn’t a straightforward complication and, at this point, I felt it was unlikely to be a spasm.
“The left-hand side of her mouth and perioral area looked unwell; her capillary refill was also sluggish on that side. More worrying was that the area where my cannula entry point had been was also slow to refill; the patient also reported more pain there compared to the day before.
“It wasn’t getting any better so now I was led by the pain as to what to do next,” he recalled.
***
Stage 9: Administering more hyaluronidase and aspirin
“I continued to conduct capillary refill tests and a really worrying thing happened. When pressing on the left-hand side of her upper lip and the area above, it not only blanched but stayed blanched. It also looked much more swollen than her right-hand side.
“I treated her with two more vials of hyaluronidase using a needle and serial punch technique. Also, I gave her 300mg of aspirin. She clearly had an ongoing vascular event so the aspirin was to help prevent blood clots forming to avoid what might have been further occlusion.
“I was worried at this point as it didn’t appear to be getting any better so I went through the full thickness of the left-side of her lip with the Hyalase.”
The patient went home and kept in contact. On Day 3 of the complication, she reported no concerns. She was called back into clinic on Day 4 so Dr Marcus could monitor her in-person.
Stage 10: New challenges on Day 4
“Day 4 was an interesting one as it came with some new challenges,” Dr Marcus recollected.
“This was when the patient reported bleeding when brushing her teeth. Her oral mucosa on the left side was bleeding and breaking down during brushing. Additionally, she noted increasing sinus pressure in the top of her nose. Her symptoms weren’t getting better, instead they were evolving in new ways, even though her actual lip was slightly improved.
“One of the most worrying signs for me was when the patient said, ‘My nose feels more painful, it feels more swollen and I’ve noticed a rash on my nose.” I examined her and saw that her nose did look more red. Upon closer inspection, I found that up her nose and into her glabella, there was a mottling, livido reticularis rash of low skin perfusion.”
***
Stage 11: Potential glabella involvement
“When my patient told me she was experiencing a swollen, painful nose with a rash – those are words you just do not want to hear!
“The initial problem was in the lips and now we’re looking at the glabella. As all aesthetic practitioners understand, the glabella is such a high-risk area that complications here can be terrifying. This is not an area where there’s any room for error – you don’t want to get anything wrong.
“As my patient still had significant sinus pressure, this was a scary turn of events. Remaining calm, I considered that she’d probably had some micro-emboli events. These could have occurred as a result of fracturing during the hyaluronidase administration, which had flown off into all these other little vessels.
“I saw she had some breakdown of her skin when examining the oral mucosa. There was yellowing from bruising but her lip was feeling better. Cap refill times were now slow everywhere. This was to be expected given the ‘bogginess’ caused by the 4mls of saline injected over two days. All the same, it wasn’t helpful and meant I couldn’t assess things effectively.”
***
Stage 12: Team support from my Harley Academy network
Never underestimate the value of having a supportive professional network. No matter how advanced a clinician you are, being able to discuss cases and get a ‘sense check’ from injectors you trust is incredibly reassuring.
“I spoke to our team at Harley Academy, my brother, Dr Tristan Mehta, and our Chief Medical Officer at Harley Academy and The Academy Clinic, Dr Emily Mehta. It was so valuable to have that support. Together, we were able to work out exactly where we were, and they helped me to strategize on how to solve it. It was clear that it was a particularly complex case and there was no easy, straightforward solution. We agreed I had to identify and follow the pain – it was the only sign I had so I had to use this to guide me.
“After a thorough review of the case and potential pathways to resolution, I knew I had tried everything it was recommended to do. As a medical doctor, I’m used to having lots of options – lots of different things I can try. But as a cosmetic doctor, the scope is far more limited.
“The pain was getting better in the lip and the bleeding was likely caused by skin breakdown from a period of tissue ischaemia that was now improving, so the best thing to do was wait.”
***
Stage 13: Injecting the nose with hyaluronidase
Dr Marcus said, “My last step was to administer a further two vials of hyaluronidase. I used a serial puncture technique and treated the whole nose. From the columella region and up the angular artery, I flooded all the way up into the glabella with Hyalase.
“The most interesting thing about that, was that within a minute of having done that, the patient described her sinus pain as ‘disappearing’. That was such an interesting finding for me. It was confirmation that there was clearly something, somewhere causing this back pressure.
***
Stage 14: Starting to see improvements at Day 7
“Within two minutes of that last round of dissolving, the patient said to me ‘Marcus, I genuinely feel like it’s gone.’
“Her pain subsided, which made me feel much better about the situation. I was able to send her home and FaceTime her every six hours or so, just to make sure she was ok.
“On Day 7, the patient came back in to see me and, though not yet fully resolved, her nasolabial fold was looking a lot better. Again, due to the amount of saline, there was still ‘bogginess’ which returned a sluggish capillary refill time. Overall, things were in a much better place now, though, so the patient went home again.”
***
Stage 15: Resurgence of pain at Day 9 and eventual resolution
Dr Marcus – and, obviously, his patient – had hoped that the last rounds of hyaluronidase had resolved the issue. However, as a responsible practitioner, he kept in touch and, at Day 9 she started to experience pain in her nose again.
“She had had a few pain-free days and then it came back. Where she had received so many injections over the past week or so, she developed a skin infection and a bit of cellulitis.
“I prescribed a course of antibiotics and it completely eradicated it.”
Reflecting on his vascular occlusion case
“It’s been a real journey for me recently, going through my worst complication in over 10 years of aesthetic practice. I wouldn't say it's put me off treatment, but it's definitely made me reflect,” confirmed Dr Marcus.
“One of the most frustrating things about this experience is that I still don’t know why it happened. On that day I had to treat five more patients after this vascular occlusion happened. I used the same techniques on at least one of those patients and – as had always been the case up until this point – there were no issues.”
“Whilst it’s extremely rare to experience a vascular event like this, you have to be prepared to do so. The reality of aesthetic medicine is that sometimes you will just be unlucky; it’s about giving yourself – and your patient – the best chance of a safe outcome. Also, it’s something of a numbers game given the more patients you treat, the higher the likelihood you’ll experience a complication.
“As an experienced medic, this situation was challenging and, at times, scary. This could have been an entirely different outcome for someone with less experience and without the thorough aesthetics training, medical background and solid support network I have. I don’t say this to put healthcare professionals off the specialty; instead it’s to just be honest about the fact that you have to be ok with the fact that you may cause complications in aesthetics. You just have to do your best to ensure you’re ready to tackle them if, or when, they do.
“I still see this patient – she's very happy to come back to me for her lip filler treatments although, I must admit, I’m still wary!”
5 Top tips for managing a lip filler complication:
Dr Marcus outlined the following steps for helping you with complications management...
1. Don't rush when it goes wrong
“In hindsight, I wish I’d spent longer in diagnosing my patient before starting treatment. If you treat too early, every day you get further and further away from being able to diagnose what is going on and what you’re actually seeing. If you think about it, you’re putting more needles into the skin, you’re causing more bleeding, you’re giving them aspirin and potentially causing more bruising. This gives you an increasingly hazy picture as the days go on.
“When the first signs of a potential lip filler complications arise, spend that extra time to really monitor what is happening, where and what the reasons could be. Don’t rush to treat or dissolve as every step you take can make the picture of what you’re actually dealing with less clear.
“Time shows you the evolution of the issue. Even though sometimes there are limited things you can do, take your time at each stage of the process. As I said before, don’t rush when things go wrong!”
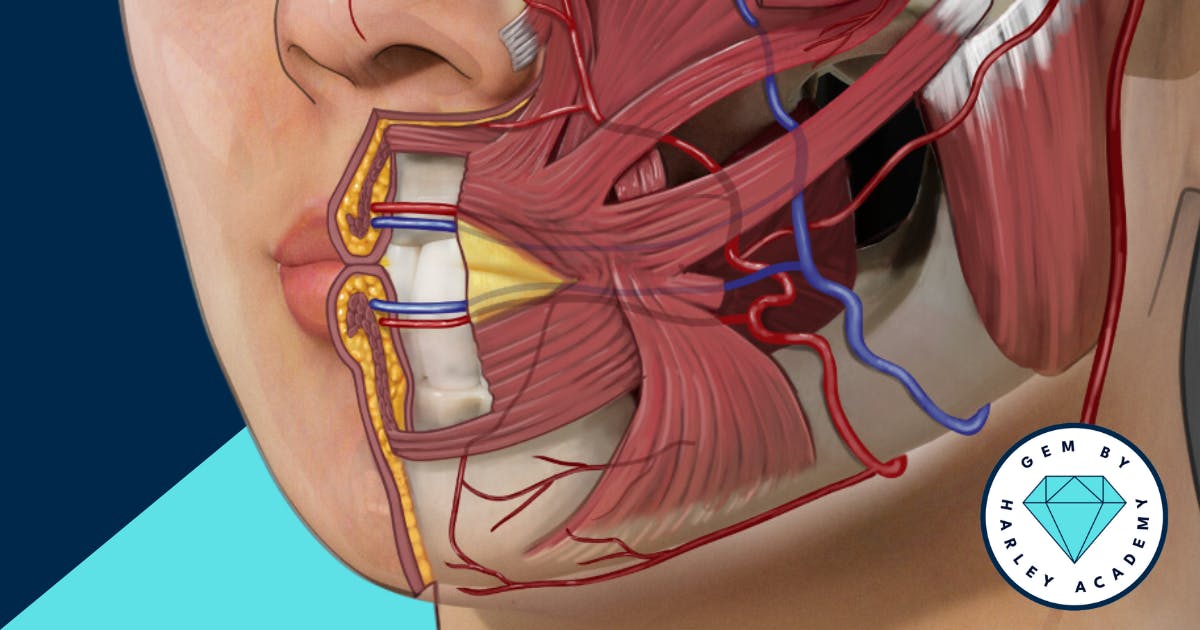
2. Know your anatomy
“Understanding your facial anatomy is key to successful treatments and complications management. This is something we place a huge amount of emphasis on in all Harley Academy botox and filler courses. You need to really know your vasculature, the placement of arteries, to have the best chance of injecting in the right place. This is something our Global Evidence Matrix – GEM by Harley Academy – supports with. Not only does our app detail best practice for injection technique, depth, tool, product and product placement, it also indicates the risk-level of the procedure. Furthermore, it explains the potential dangers associated with each specific filler treatment in every area.”
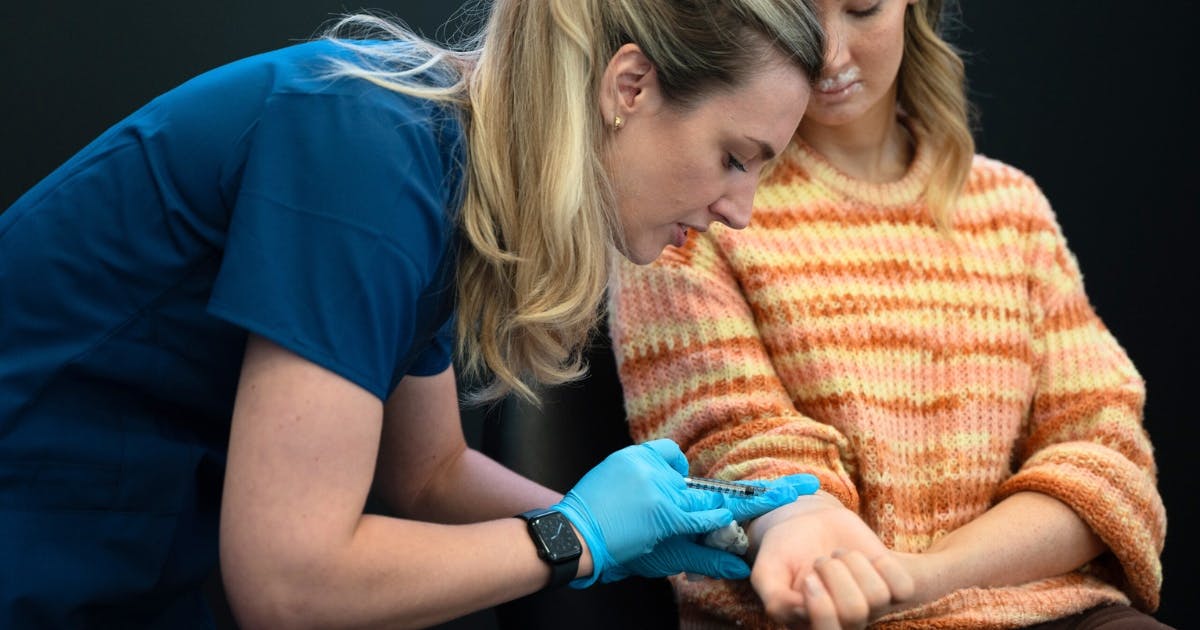
3. Complications management should be done in person
“Complications should always be dealt with in person as you need to see the skin up-close and palpate it. You need to be carrying out capillary refill tests and assessing the skin. I would always caution against trying to manage such a situation through video conferencing or photos as you’re not getting the full picture. To manage these issues effectively, you need as much information as possible and you won’t get that from a photo or video. Video calls are only suitable for follow-ups once you’re confident the issue is under control and the patient reports no symptoms.”
3. Document every stage of the process in photo and video
“By taking photos and videos at each stage of the complications management process, you can refer back and compare outcomes. This documentation is incredibly useful as it means you’re not relying on memory to decide if there are any changes. When complications management spans more than one day, this process becomes especially invaluable.”
4. Lean on your professional network for support
“Every aesthetic practitioner needs a strong support network of trusted advisors in the field. You can start building your network from your very first day of aesthetics training. Make contacts at events, conferences – you can even join online networks such as Comma. Being able to discuss cases with your network and ask for their expert advice, especially when they’re more experienced, is so valuable. You not only get their advice, you also gain perspective, help in organising your own thoughts and reassurance that you’re not on your own. Managing complications can be incredibly scary so you need a reliable team you can lean on – even, or perhaps especially, if you’re a solo injector.”
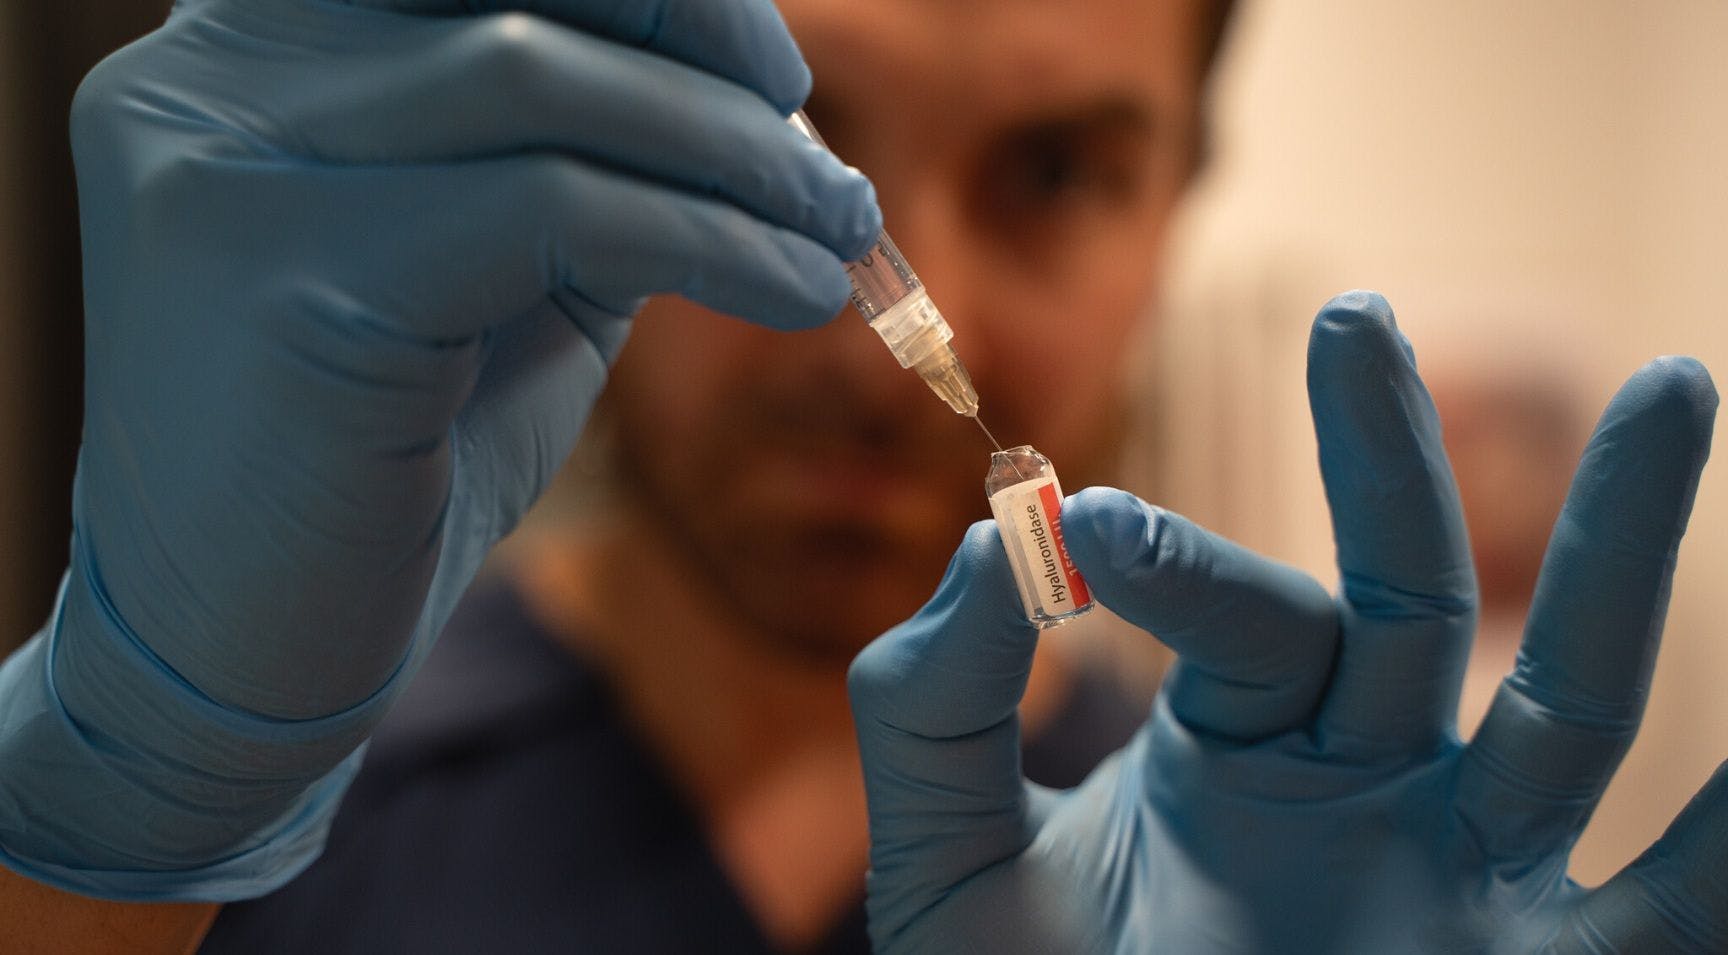
5. Ensure you’re prepared to dissolve filler
“When was the last time you injected hyaluronidase? Do you know how to reconstitute it? Would you remember under pressure? I highly recommend running regular hyaluronidase drills to ensure you’re confident with the protocol. That includes not just mixing and injecting, but knowing where your stock is kept and making sure it’s in-date.”
All information correct at time of publication
Download our full prospectus
Browse all our injectables, dermal fillers and cosmetic dermatology courses in one document
By submitting this form, you agree to receive marketing about our products, events, promotions and exclusive content. Consent is not a condition of purchase, and no purchase is necessary. Message frequency varies. View our Privacy Policy and Terms & Conditions
Attend our FREE open evening
If you're not sure which course is right for you, let us help
Join us online or in-person at our free open evening to learn more
Our Partners


STAY INFORMED
Sign up to receive industry news, careers advice, special offers and information on Harley Academy courses and services